How to Write an Xactimate Roofing Estimate That Actually Gets Approved
Kelvin Spratt
Founder, Supplement Snap · October 22, 2026 · Updated October 22, 2026
Before You Submit
12 Checks
The review checklist at the end of this guide catches the most common reasons roof estimates get cut
Key Takeaways
How to write an Xactimate roofing estimate adjusters approve: accurate measurements, complete line items, waste and pitch charges, O&P and photo proof.
Preparing a supplement? Use the free checklist so nothing is missing when you submit.
What does an approved Xactimate roofing estimate actually look like?
An approved estimate is one the adjuster can verify quickly and has no reason to cut. It does not mean the highest number. It means every line item ties back to a measurement, a photo or a building code, so the adjuster can say yes without a long back-and-forth.
Most reductions are not about the carrier being unfair. They happen because something on the estimate could not be verified in a few minutes: a quantity with no source, a charge with no explanation, or a component that was never mentioned. Your job is to remove those gaps before you submit.
This guide covers the estimate you write for the claim itself. If you are adding items after tear-off, read how to build an Xactimate roof estimate for insurance supplements and keep the Xactimate codes reference open while you work.
Start with measurements the adjuster can trust
Every number on a roof estimate starts with measurements. If those are weak, everything built on them is easy to challenge.
Use a satellite or drone measurement report when you can, and confirm it with a few taped dimensions on the roof. Record these for each slope:
Area in squares
Pitch (rise over 12 inches of run)
Eave, rake, ridge, hip and valley lengths
Number of stories and any access problems
Attach the report or your field notes to the estimate. When the adjuster can see where each quantity came from, there is much less to argue about.
Estimates That Get Reduced
- Roof area guessed from the ground
- Pitch and height not recorded
- Missing starter, drip edge, ridge cap
- Round-number quantities with no source
- No photos tied to line items
Estimates That Get Approved
- Measurement report or taped dimensions attached
- Pitch, stories and access noted per slope
- Every roof component itemized
- Quantities traceable to measurements
- Each line item backed by a labeled photo
Build the estimate in the order adjusters read it
Adjusters review estimates top to bottom, usually slope by slope or trade by trade. A clean structure makes your estimate easier to approve because it matches how they check their own work.
A reliable order is: claim setup, roof sketch, main shingle items, accessories, charges, then overhead and profit. Document each step as you go so nothing depends on memory later.
Set up the claim
Enter the loss date, price list and property details so unit prices match the right region and quarter.
Add the roof sketch
Draw each slope or import a measurement report so area, ridge, hip, valley, rake and eave lengths come from real numbers.
Choose the shingle line items
Pick the tear-off and install items for the shingle type actually on the roof, then add waste.
Add the accessories
Starter, drip edge, ridge cap, underlayment, ice and water barrier, vents, pipe jacks and flashing.
Apply charges and O&P
Add pitch and height charges where they apply, plus overhead and profit when the job qualifies.
Attach photos and notes
Tie each item to a labeled photo so the adjuster can verify it without calling you.
Line items that get left off roof estimates
Missing items are the most common source of lost revenue. A shingle line alone does not describe a roof replacement. Check that these are on your estimate when they apply to the job:
Starter strip: Installed along eaves and rakes on most shingle systems
Drip edge: Often required by code, and frequently missing from first estimates
Ridge and hip cap: Priced separately from field shingles
Underlayment: Felt or synthetic, matched to the manufacturer and local code
Ice and water barrier: Required in many climates at eaves and valleys
Pipe jacks and vents: Count every one and itemize them
Step flashing and counter flashing: Measured in linear feet at walls and chimneys
Debris haul-off: Including extra layers when there are two roofs on the house
The Xactimate item names and codes for these are in our codes reference. Always confirm the exact item and unit price against your own price list, since codes and pricing change by region and by quarter.
Waste, pitch and height: where estimates get challenged
Three adjustments cause more disagreement than any others.
Waste: Shingle waste depends on roof shape. A simple gable roof wastes less than a cut-up hip roof with many valleys. State the percentage you used and be ready to explain it. A single blanket number applied to every roof looks careless.
Pitch: Steeper roofs take more labor and carry extra charges in Xactimate. Record the pitch for every slope with a gauge in the photo, not just an estimate from the ground.
Height: Roofs on taller homes can qualify for an additional charge for the added difficulty. Note the number of stories and photograph the home from the street so the adjuster can see it.
Do not round up quantities without a reason
Adjusters compare your quantities to the measurements. If you claim 28 squares and the report shows 24.6 plus waste, expect a call or a cut. Show the math and the waste percentage you used.
Overhead and profit: ask for it when it applies
Overhead and profit, usually shortened to O&P, covers the general contractor's cost of coordinating a job. It is commonly requested when a repair involves several trades, such as roofing plus gutters, siding, drywall or paint.
Carriers often resist O&P, so do not tack it on without support. List the trades involved, show that a general contractor is needed to coordinate them, and cite your policy language and state rules where they apply. Rules vary, so check what your state and the policy allow.
Photos and notes that prove every line item
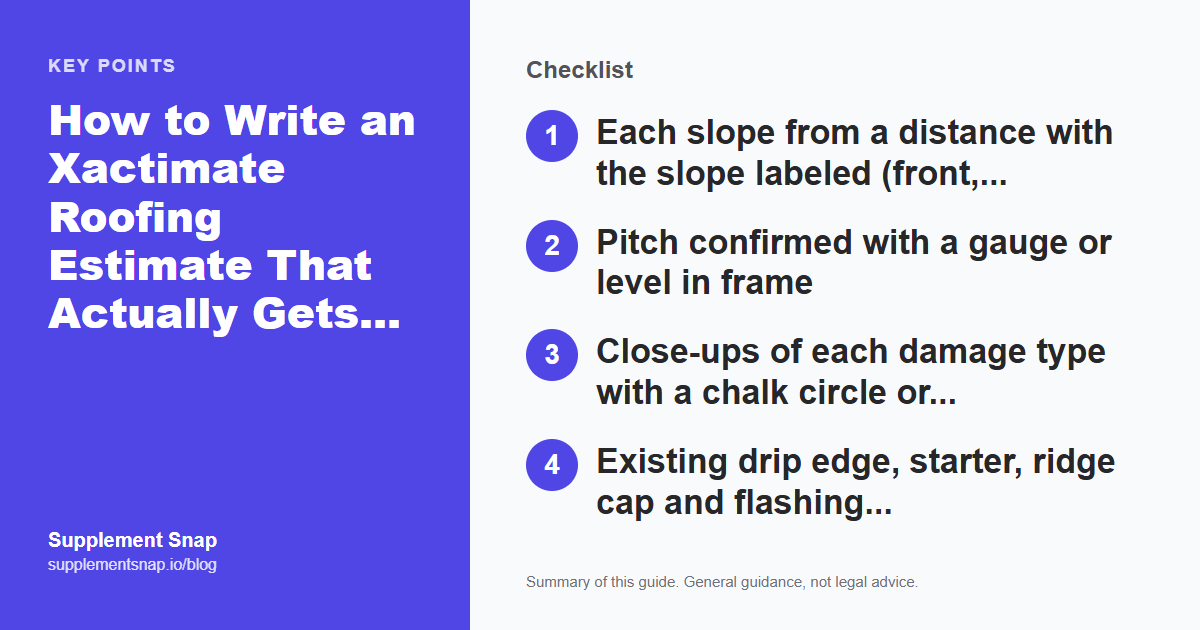
The estimate says what you want paid. The photos prove why. Every significant line item should have at least one labeled photo, and the labels should match the line item names so the adjuster can connect them instantly.
Take photos before anything is removed or covered, and keep the originals. Metadata such as time and location helps establish when and where the photo was taken. Our guide to hail damage roof inspections explains what to capture on the roof, and the roof inspection report guide covers how to organize it.
Photo Checklist for an Xactimate Roof Estimate
Review your estimate before you submit it
A five-minute review catches mistakes that cost you days later. Read the estimate as if you were the adjuster looking for a reason to question it, then work through the checklist below.
If you find a gap, fix it now. Once the estimate is submitted, every correction becomes a supplement and a new round of review.
12-Point Review Before You Submit
What to do when your estimate is cut anyway
Even a strong estimate can come back reduced. Do not accept the first number without reading the reasons. Compare the carrier's version to yours line by line and identify exactly what changed: quantities, items removed, or charges disallowed.
Respond in writing, item by item, and attach the photo or measurement that answers each cut. Our guide on what to do when a roofing supplement is denied walks through the appeal process, and how to write a roofing supplement shows how to document additional damage found during tear-off.
A simple worked example of the process
Here is how the steps fit together on a straightforward asphalt shingle replacement. The quantities are illustrative.
You measure a gable roof at 28 squares on a 6/12 pitch. You note two stories on the street side and photograph each slope. You choose the tear-off and install items for the shingle type on the roof, then apply a waste percentage appropriate for a simple gable roof. You add starter, ridge cap, drip edge, underlayment and ice and water barrier at the eaves and valleys, count the pipe jacks and vents, and add step flashing along the chimney. Then you apply any pitch or height charge that fits, attach the measurement report and photos, and review the checklist.
Nothing in that list is exotic. A good estimate is a complete and traceable version of ordinary work.
Estimate versus supplement: what goes where
The estimate covers what is visible and known when the roof is inspected. The supplement covers what is found later or was left out.
Put in the estimate: Measured area, shingle type, standard accessories, known code requirements and visible damage.
Save for the supplement: Hidden damage found at tear-off, such as rotted decking, and items that could not be seen from the surface.
A thorough estimate means a smaller, easier supplement. If you want the supplement side, read how to build an Xactimate roof estimate for supplements.
Matching, repairability and discontinued shingles
When only part of a roof is damaged, a common question is whether the carrier must replace more than the damaged area so the roof matches. The answer depends on the policy and on the rules in your state, and these disputes are common.
If matching is an issue on your job:
Document the shingle: Take photos of the product, the exposure and any markings, and note whether it is still manufactured.
Document the condition: Record brittleness, age and any repair attempts, and describe how you tested repairability.
Check the rules: Look at the policy and your state's guidance before you argue the point.
Keep the discussion factual. Photos and manufacturer information carry far more weight than opinion.
How carriers review roof estimates
Carriers often use a mix of desk review, measurement reports and photo review. Understanding that helps you write estimates that pass quickly.
Desk review: A reviewer checks your numbers against the measurement report and standard pricing.
Photo review: A reviewer looks for a photo behind each major line item.
Exception review: Anything unusual gets extra scrutiny and may be sent to a supervisor.
The lesson is consistent across all three. Make every number traceable, every item visible in a photo and every exception explained in a sentence.
How Supplement Snap helps you build estimates adjusters approve
Most estimate disputes come down to documentation. Photos are scattered across phones, notes get lost and nobody remembers which picture shows which damage.
Supplement Snap lets your crew capture photos from the roof, attach notes to each finding, and organize everything by project. It generates a supplement narrative and a PDF report you can send to the adjuster, so the evidence that supports your estimate is ready when the adjuster asks for it.
Frequently asked questions
What is an Xactimate roofing estimate?
It is a repair or replacement estimate for a roof built in Xactimate, using standard line items, units and regional unit prices that insurance carriers recognize.
Why do adjusters reduce roofing estimates?
Common reasons are unverified quantities, missing photos, items that do not match the policy and charges that were not explained.
Do I need a measurement report to write a roof estimate?
It is not required, but a satellite or drone report makes your quantities easier to verify, and taped dimensions can confirm it.
What is the difference between an estimate and a supplement?
The estimate covers visible, known work. A supplement covers additional damage or items found later or left out.
References & Resources
Free tools and resources
Ready to streamline your supplement process?
Supplement Snap helps your crew capture hidden damage during tear-off and generate adjuster-ready reports in minutes.
Written by
Kelvin Spratt
Founder, Supplement Snap
Kelvin builds software for roofing contractors who are tired of leaving supplement money on the table. His background in software development and insurance restoration workflows drives everything Supplement Snap does.