Roof Inspection Report: What to Include and How to Write One
Kelvin Spratt
Founder, Supplement Snap · March 27, 2026
Reports That Get Approved
3x faster
When they include tagged photos, narratives, and Xactimate codes
Key Takeaways
Learn how to write a professional roof inspection report that gets insurance claims approved. Includes what to document, report structure, common mistakes, and software tools.
What is a roof inspection report?
A roof inspection report is a formal document that records the current condition of a roofing system. It details the materials, measurements, condition, and any damage or deficiencies found during the inspection. A well-written roof inspection report serves as the foundation for repair estimates, insurance claims, real estate transactions, and maintenance planning.
For contractors, the roof inspection report is one of the most important documents you produce. It is the evidence that supports your repair recommendation, your insurance supplement, or your bid for the job. A strong report builds credibility with homeowners, earns trust from insurance adjusters, and differentiates you from competitors who show up with a clipboard and a verbal estimate.
For homeowners, the inspection report provides clarity about the condition of their roof, what needs attention, and what it will cost. For insurance adjusters, the report provides the documentation they need to process claims efficiently. For real estate buyers, it provides an objective assessment of one of the most expensive components of the property.
Regardless of who the audience is, a roof inspection report must be thorough, specific, well-organized, and supported by photographic evidence. Vague reports with blurry photos and generic descriptions fail everyone involved.
What to include in a roof inspection report
A complete roof inspection report should include the following elements, organized in a logical structure that makes it easy for the reader to understand the condition of the roof and the recommended actions.
Property and inspection information: Start with the basics. Property address, homeowner name, date of inspection, inspector name and company, and any relevant claim or policy numbers. This establishes context and traceability.
Roof system overview: Document the roofing material (asphalt shingles, tile, metal, flat membrane), estimated age, total roof area in squares, roof pitch, number of slopes, and general configuration. Note any features like skylights, solar panels, chimneys, sidewalls, or unusual penetrations.
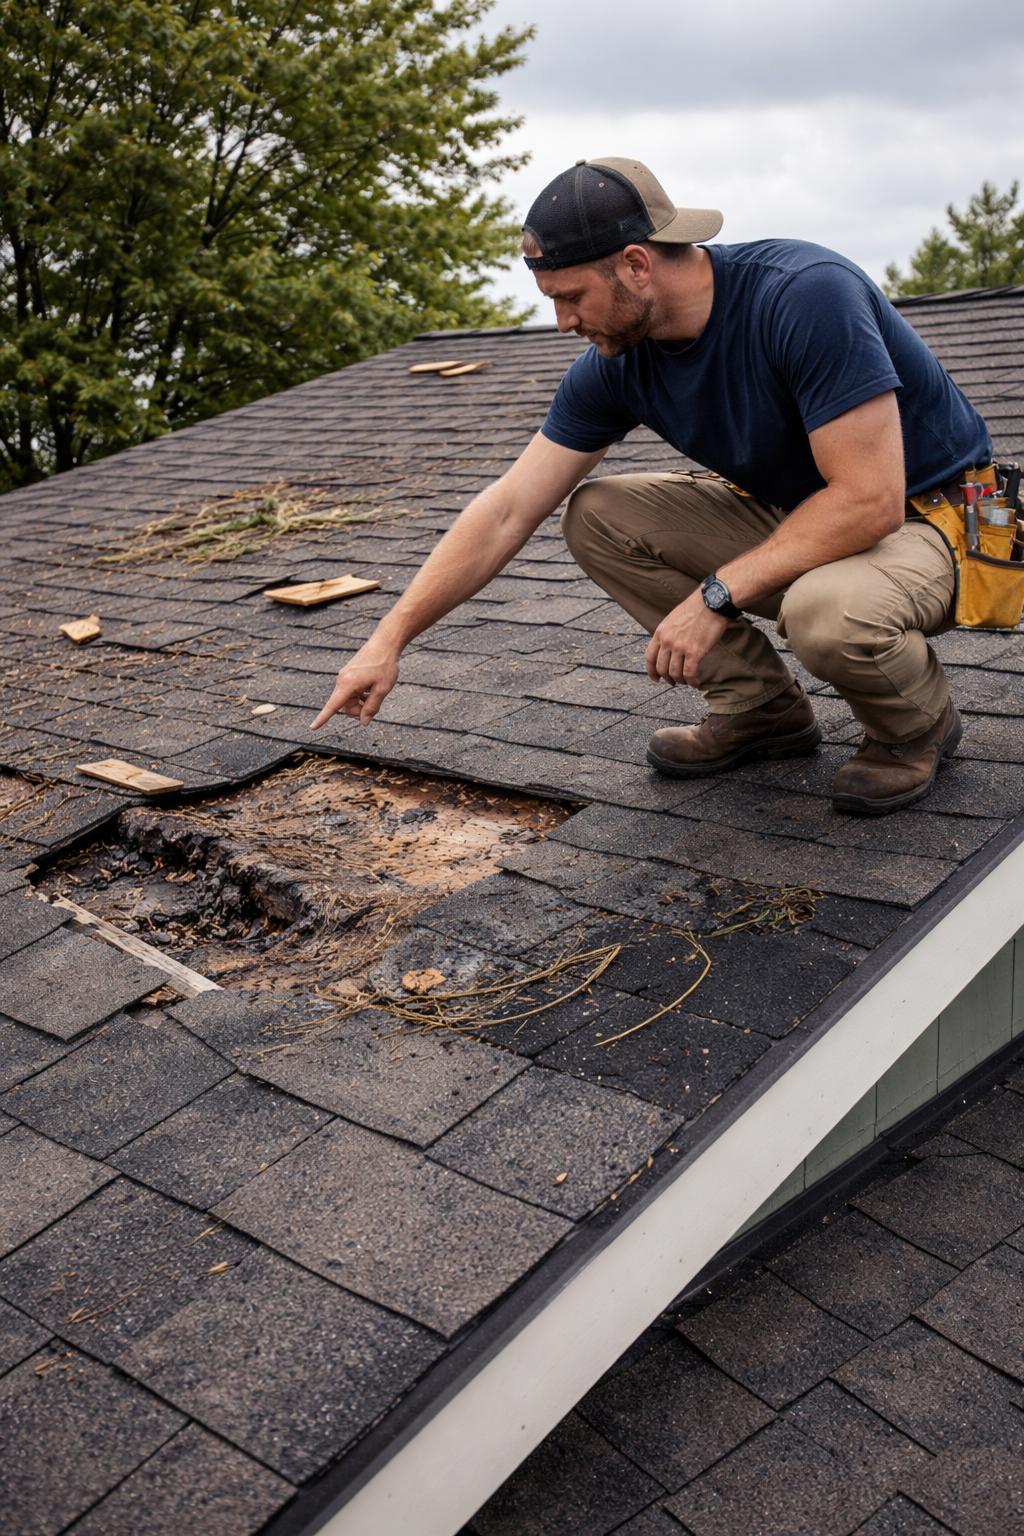
Photographic documentation: This is the backbone of any inspection report. Include:
Wide-angle overview photos of each roof slope, showing the general condition
Close-up detail photos of every specific damage finding
Photos of all flashings, penetrations, valleys, ridges, and eaves
Photos of gutters, downspouts, soffits, and fascia
Interior photos if accessible (attic inspection for leaks, stains, daylight penetration)
Damage findings: For each finding, provide the damage type (hail, wind, age, water), specific location on the roof (front slope near ridge, left valley, chimney south side), severity (minor, moderate, severe), measurements or quantities where applicable, and a written description of the condition.
Repair recommendation: Based on your findings, state whether the roof needs localized repair, partial replacement, or full replacement. Explain your reasoning. If the roof is a candidate for an insurance claim, note the suspected cause of damage (storm, hail, wind) and recommend the homeowner file a claim.
Xactimate coding (for insurance reports): If the report supports an insurance claim or supplement, include the relevant Xactimate line codes, units, quantities, and pricing for each recommended repair item.
Roof Inspection Report Essentials
How to write a roof inspection report step by step
Writing a strong roof inspection report follows a systematic process. If you build good habits here, every report you produce will be professional, thorough, and persuasive.
Start by gathering property information before you get on the roof. Record the address, homeowner contact information, insurance claim number if applicable, and get roof measurements. Satellite measurement tools can provide accurate dimensions, or you can measure in the field.
On the roof, inspect systematically. Walk every slope from ridge to eave. Inspect every valley, every penetration, every flashing intersection. Check the ridge cap, the starter strip at the eaves, and the condition of drip edge and gutters. Use a consistent pattern so you never skip an area.
As you inspect, photograph and document each finding in real time. Take a wide-angle shot showing the general area, then a close-up of the specific damage. Record the damage type, location, and severity while you are looking at it. Do not rely on memory. Do not plan to "write it up later." The best reports are documented on the roof, in the moment.
Back at the office (or better yet, directly from the field), compile your findings into a structured report. Group findings by roof area or by damage type. Write a clear description for each finding that explains what was found, where it was found, the probable cause, and the recommended repair.
If the report is for an insurance claim, add Xactimate line codes for each repair item. Map your findings to the correct codes, include accurate quantities, and use current pricing. This step is what transforms a basic inspection report into an insurance-ready document that adjusters can process quickly.
Finish with a summary and recommendation. State the overall condition of the roof, summarize the key findings, and clearly recommend the appropriate course of action.
Gather property information
Record the property address, homeowner name, insurance company, claim number (if applicable), and date of inspection. Get roof measurements from satellite tools or field measurements.
Inspect and photograph systematically
Walk every slope, valley, ridge, eave, and penetration. Take wide-angle context shots of each area, then close-up detail shots of every finding. Use a consistent pattern so nothing gets missed.
Document each finding
For every damage finding, record the damage type, specific location on the roof, severity, and measurements. Tag photos with what they show so you can match them to descriptions later.
Write damage descriptions
For each finding, write a clear, specific description. State what the damage is, where it is located, the likely cause, and the recommended repair. Avoid vague language.
Add Xactimate codes (for insurance)
If the report supports an insurance claim, map each finding to the correct Xactimate line code with proper units and quantities. This makes the adjuster's job easier and speeds up approval.
Compile and deliver the report
Assemble everything into a clean, professional PDF. Include a cover page, findings summary, individual finding pages with photos and descriptions, and your recommendation. Email it to the client or adjuster.
Report format and structure
The format and structure of your roof inspection report matters more than most contractors realize. A well-organized report communicates professionalism and makes it easy for the reader to find the information they need.
Cover page: Include your company name and logo, the property address, date of inspection, and the purpose of the report (storm damage assessment, annual inspection, pre-purchase evaluation, supplement documentation).
Executive summary: A one-paragraph overview of the roof's condition and your primary recommendation. This is for readers who want the bottom line before diving into details.
Roof system details: A section covering material type, estimated age, total area, pitch, configuration, and notable features. This provides context for the findings that follow.
Findings section: The core of the report. Each finding gets its own entry with photos, a written description, location, severity, and recommended repair. Number your findings for easy reference.
Findings summary table: A table listing all findings at a glance with finding number, description, location, severity, and estimated cost or Xactimate code. This gives the reader a quick overview of all issues.
Recommendation: Your professional assessment of whether the roof needs repair, partial replacement, or full replacement, with supporting reasoning.
Appendix (optional): Additional photos, measurement diagrams, code references, or manufacturer specifications that support your findings.
Keep the report clean and easy to read. Use consistent formatting, clear headings, and high-quality photos. Avoid walls of text. Break information into digestible sections. The goal is a document that a homeowner, adjuster, or real estate agent can pick up and immediately understand the condition of the roof.
Weak Inspection Report
- Camera roll photos with no labels
- No written descriptions of damage
- Missing measurements and quantities
- No roof diagram or location references
- Submitted as loose photos via text message
- No Xactimate codes or pricing
Strong Inspection Report
- Tagged photos with damage type and roof area
- Detailed narrative for each finding
- Accurate measurements and quantities included
- Findings mapped to specific roof locations
- Professional branded PDF delivered same day
- Xactimate line codes with current pricing
Common mistakes in roof inspection reports
Even experienced contractors make mistakes in their inspection reports that weaken the document and reduce their chances of getting claims approved or winning jobs. Here are the most common problems and how to avoid them.
Vague descriptions: Writing "shingles are damaged" tells the reader nothing useful. Instead, write "Three-tab asphalt shingles on the front (south-facing) slope show hail impact damage with displaced granules and exposed fiberglass mat. Damage is scattered across approximately 60% of the slope surface."
Insufficient photos: Two or three photos of a 30-square roof is not enough. A thorough report includes at minimum one overview photo per slope, one close-up per finding, and photos of all flashings and penetrations. For a typical residential roof, that means 20 to 40 photos.
Missing measurements: Findings without measurements cannot be priced accurately. If you report damaged decking, how many square feet? If flashing needs replacement, how many linear feet? Numbers matter.
No location references: Stating that damage was found "on the roof" is not helpful. Specify the slope (front, back, left, right), the area (near ridge, mid-slope, at eave), and the proximity to features (adjacent to chimney, in the main valley, along the rake edge).
Delayed documentation: Writing the report three days after the inspection from memory guarantees that details will be wrong or missing. Document in real time on the roof.
Missing code references: When a repair is required by building code, citing the specific code strengthens your case significantly. For example, referencing the requirement for ice and water shield in valleys and at eaves per the International Building Code makes it much harder for an adjuster to deny that line item.
No Xactimate coding: For insurance reports, submitting findings without Xactimate codes forces the adjuster to do the coding themselves. This slows down approval and increases the chance they will use lower pricing or miss items.
How software automates roof inspection reports
The traditional approach to roof inspection reports involves taking photos on a phone, scribbling notes on paper or a notepad app, and then spending hours at a desk assembling everything into a document. This manual process is slow, error-prone, and does not scale when you have multiple inspections per day.
Modern inspection software changes this by moving the documentation process to the roof. Instead of taking random photos and hoping you remember the details later, you capture findings in a structured format while you are looking at the damage.
Supplement Snap takes this a step further for contractors focused on insurance work and supplement recovery. During the inspection or tear-off, your crew captures each finding in the app: a photo tagged with the damage type (decking, flashing, pipe boot, ice and water shield) and the roof area (front slope, valley, chimney). They can add a voice note describing the finding in any language.
From those structured field captures, Supplement Snap generates:
Professional damage narratives written in the specific, detailed language that adjusters require for claim processing
Xactimate line items with correct codes, accurate quantities, and current regional pricing
An Xactimate-compatible CSV export the adjuster can import directly into their estimating system
A complete, branded PDF report with cover page, findings summary, individual finding pages, and all supporting photos
The result is a professional roof inspection report produced in minutes instead of hours. Everything is captured in real time on the roof, so nothing gets lost or forgotten. The report goes to the adjuster or homeowner the same day, while the inspection is fresh. For contractors who perform multiple inspections per week, this automation is the difference between thorough documentation on every job and cutting corners because there is not enough time to write proper reports.
Once damage is documented, the next step is writing the supplement. See how to write a roofing supplement.
Common Mistake: Relying on Memory
The number one mistake contractors make is inspecting the roof, taking a few photos, and then trying to write the report days later from memory. By the time you sit down to write, you have forgotten which photo goes with which finding, you cannot remember exact locations, and the report ends up vague and unconvincing. Document everything on the roof, in real time, while you are looking at it.
References & Resources
Ready to streamline your supplement process?
Supplement Snap helps your crew capture hidden damage during tear-off and generate adjuster-ready reports in minutes.
Written by
Kelvin Spratt
Founder, Supplement Snap
Kelvin builds software for roofing contractors who are tired of leaving supplement money on the table. His background in software development and insurance restoration workflows drives everything Supplement Snap does.