Storm Damage Roof Repair Near Me: How Contractors Win Local Storm Jobs
Kelvin Spratt
Founder, Supplement Snap · March 14, 2026
Storm Season Tip
Same-Day Documentation
Contractors who document damage during tear-off recover 2-3x more in supplements
Key Takeaways
Learn how roofing contractors can dominate local storm damage repair searches. Lead generation strategies, insurance claim workflows, supplement documentation, and how to stand out from storm chasers.
What qualifies as storm damage on a roof?
Storm damage to a roof can come from wind, hail, fallen trees, flying debris, or heavy rain that exploits existing vulnerabilities. Each type of storm leaves a different signature on your roofing materials, and understanding what to look for is the first step toward getting a proper repair.
Wind damage typically shows up as lifted, creased, or missing shingles. During high winds, the edges and ridge line of the roof take the most force, so you'll often see damage concentrated along the perimeter and at the peak. In severe cases, entire sections of shingles can be peeled back, exposing the underlayment or decking beneath.
Hail damage is harder to spot from the ground. Hail impacts create small dents or bruises on asphalt shingles, knocking loose the protective granules. These impacts weaken the shingle's ability to shed water, leading to premature failure. A trained inspector can identify hail hits by their circular pattern and the exposed black substrate where granules have been displaced.
Falling branches and debris cause obvious puncture damage, but they can also crack decking, bend flashing, and dislodge ridge caps. Even if the visible damage looks minor, the underlying structure may have taken a significant hit.
Heavy rain and ice dams don't always damage the roof surface directly, but they can drive water into areas where flashing has failed, where ice and water shield is missing, or where previous repairs were done poorly. The resulting water damage to decking and rafters often isn't visible until tear-off.
If you've experienced a significant storm, don't assume your roof is fine just because you don't see missing shingles from the ground. Many types of storm damage are only visible from the roof surface, and concealed damage beneath the shingles may not become apparent until a contractor begins the repair.
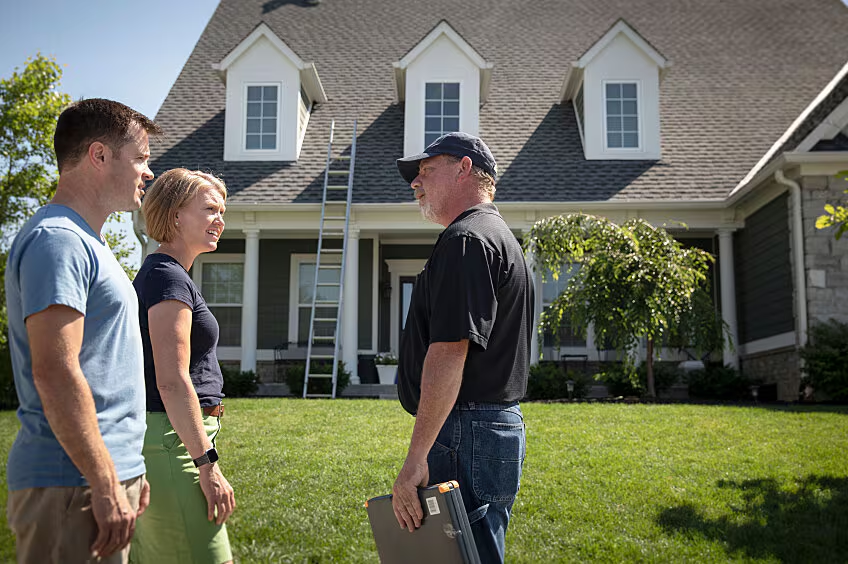
How to find a qualified storm damage contractor near you
Searching for "storm damage roof repair near me" will return dozens of results, and after a major storm, your phone may ring with contractors offering free inspections. The challenge is separating qualified local professionals from out-of-town storm chasers who follow weather events from state to state.
Start with these verification steps:
Check licensing: Every state has different contractor licensing requirements. Verify the contractor's license number through your state's licensing board website. If they can't provide a license number, move on.
Confirm insurance: Ask for a certificate of insurance showing both general liability and workers' compensation coverage. Call the insurance company listed on the certificate to confirm the policy is active. If a worker is injured on your property and the contractor doesn't carry workers' comp, you could be liable.
Look for a local presence: A contractor with a local office, warehouse, or yard has a stake in the community. They'll be around to honor warranties and address issues. A contractor operating out of a hotel room two states away may not be.
Check references and reviews: Look at Google reviews, Better Business Bureau ratings, and Angi profiles. Pay attention to how the contractor responds to negative reviews. Ask for references from recent storm damage jobs in your area.
Verify manufacturer certifications: Certifications from shingle manufacturers (GAF Master Elite, Owens Corning Platinum, CertainTeed SELECT ShingleMaster) indicate the contractor has met training and performance standards. These certifications also provide extended warranty options for your new roof.
Ask about supplement experience: This is a detail many homeowners overlook. A contractor experienced with insurance supplements understands how to document concealed damage properly and recover the full cost of repairs from your insurance company. This means you're less likely to face unexpected out-of-pocket costs.
What to Look For in a Storm Damage Contractor
Red flags: how to spot storm chasers and avoid scams
Storm chasers are contractors (or people posing as contractors) who travel to areas hit by severe weather, knock on doors, and offer quick roof repairs. Some are legitimate businesses working outside their home market. Many are not. Here's how to protect yourself.
Door-to-door solicitation right after a storm is the most common storm chaser tactic. A person shows up at your door, says they noticed damage on your roof, and offers a free inspection. They may even climb onto your roof uninvited. While some legitimate companies do canvass after storms, be cautious of anyone who pressures you to sign a contract on the spot.
High-pressure sales tactics are a major warning sign. If someone tells you the damage will get worse if you don't act today, that the insurance company will deny your claim if you wait, or that they can only offer this price right now, they're trying to prevent you from doing your due diligence. A legitimate contractor will give you time to verify their credentials and get competing estimates.
Requesting full payment upfront (or even a large deposit) before any work begins is a red flag. Standard practice in the industry is to collect a deposit of no more than 10-20% at contract signing, with the balance due upon completion. Some storm chasers collect full payment and never return.
Offering to "cover your deductible" or "waive your deductible" is not a favor. It is insurance fraud in most states. The contractor inflates the claim amount to absorb the deductible, which is illegal. If a contractor makes this offer, they are telling you they are willing to commit fraud on your behalf. Walk away.
No local address or verifiable history is a clear indicator. Ask for a physical business address (not a P.O. box). Search for the company name plus the city to see if they have an established presence. Check how long their website has been active. Storm chasers often set up temporary websites and Google Business profiles for each market they enter.
If you've already signed a contract with a company you now suspect is illegitimate, check your state's contractor cancellation laws. Many states allow a 3-day right of rescission for home improvement contracts signed at your residence.
Storm Chaser Red Flags
Be cautious of contractors who show up uninvited after a storm, pressure you to sign immediately, ask for full payment upfront, cannot provide a local address, or offer to "cover your deductible." Covering a homeowner's deductible is insurance fraud in most states. Legitimate contractors will never suggest it.
How the insurance claim process works for storm damage repairs
Understanding the insurance claim process helps you work effectively with both your insurance company and your contractor. Here is the typical timeline from storm to completed repair.
Step 1: File the claim promptly. Contact your insurance company within 24-48 hours of the storm. Most policies have time limits for reporting damage, and delays can complicate your claim. Your insurer will assign a claim number and schedule an adjuster visit.
Step 2: Get an independent contractor inspection. Before the adjuster arrives, have a qualified contractor inspect your roof. They should document all visible damage with photos and provide you with a written assessment. This gives you a baseline to compare against the adjuster's findings.
Step 3: The adjuster inspection. The insurance adjuster will visit your property, inspect the roof, and write an initial estimate using Xactimate. A good practice is to have your contractor present during this inspection so they can point out damage the adjuster might miss. The adjuster's estimate covers only what they can see from the surface.
Step 4: Review the initial estimate. Your contractor should review the adjuster's Xactimate estimate with you. They can identify items that may have been missed or undervalued. If significant visible damage was overlooked, your contractor can request a re-inspection before work begins.
Step 5: Authorize repairs and begin work. Once you're satisfied with the scope, sign a contract with your chosen contractor and schedule the work. Your insurance company issues the first payment (minus your deductible), often held in escrow if you have a mortgage.
Step 6: Tear-off reveals hidden damage. This is the critical phase. When the crew removes the existing roofing materials, they frequently discover concealed damage: rotted decking, corroded flashing, deteriorated pipe boots, missing ice and water shield. This damage was invisible during both your contractor's inspection and the adjuster's visit.
Step 7: Your contractor submits a supplement. The supplement is a formal request for additional insurance payment to cover the concealed damage. It includes photos taken during tear-off, a professional narrative, and Xactimate line items. A well-documented supplement submitted promptly has a high approval rate.
Step 8: Supplement approval and final payment. The insurance company reviews the supplement, may request additional information or a re-inspection, and issues additional payment for approved items. The entire process from claim filing to final supplement approval typically takes 4-8 weeks.
File your insurance claim
Contact your insurance company within 24-48 hours of the storm. They will assign an adjuster and open a claim.
Schedule a contractor inspection
Have a licensed storm damage contractor inspect your roof independently. They should document all visible damage with photos.
Meet the adjuster on-site
A good contractor will meet the adjuster during the inspection to ensure all visible damage is captured in the initial estimate.
Review the initial estimate
The adjuster writes an Xactimate estimate covering visible damage. Review it with your contractor to understand the scope.
Approve the scope and schedule repairs
Once the claim is approved, sign a contract with your chosen contractor. Work should begin within 1-4 weeks depending on storm volume.
Tear-off and hidden damage discovery
During tear-off, the crew documents concealed damage (rotted decking, failed flashing, deteriorated pipe boots) for a supplement.
Supplement submission and approval
Your contractor submits a supplement to the insurance company with photos, narratives, and Xactimate line items for the hidden damage.
Final inspection and completion
After repairs are complete, the contractor does a final walkthrough. You receive warranty documentation and final paperwork.
Questions to ask before hiring a storm damage contractor
Before you sign a contract, ask these questions. The answers will tell you whether the contractor is qualified, experienced, and trustworthy.
"Can I see your license and insurance certificate?" Any legitimate contractor will have these ready. If they hesitate, make excuses, or say they'll send it later, that's a red flag.
"How long have you been operating in this area?" Local experience matters. A contractor who has worked in your region for years understands local building codes, common roofing issues for your climate, and has relationships with local suppliers and inspectors.
"Will you meet my adjuster on-site?" A contractor willing to be present during the adjuster's inspection is confident in their work and invested in making sure the claim captures all the damage.
"How do you handle hidden damage found during tear-off?" This is a critical question. The answer should involve documentation (photos, narratives), Xactimate-formatted supplements, and prompt submission to the insurance company. If the contractor says they'll "just add it to the final bill" or looks confused by the question, they may not have experience with the supplement process.
"What does your warranty cover?" Get the warranty details in writing. Understand what's covered (workmanship, materials, or both), for how long, and what would void the warranty.
"Can you provide references from recent storm damage jobs?" Call the references. Ask if the work was completed on time, if the contractor handled the insurance process smoothly, and if there were any issues after completion.
"What is your payment schedule?" Expect a small deposit at signing (10-20%), with the balance due upon satisfactory completion. Never pay the full amount before work is finished.
What the repair process looks like and what to expect with costs
A typical storm damage roof repair follows a predictable sequence, though the timeline can stretch during peak storm season when contractors are in high demand.
The contractor begins with material delivery, usually 1-3 days before the scheduled start date. Shingle bundles, underlayment rolls, flashing, and accessories are staged in your driveway or yard.
On the day of repair, the crew arrives early (typically 7-8 AM) and begins by protecting your landscaping and siding with tarps and boards. Tear-off starts at the ridge and works downward, with old shingles and underlayment stripped to the decking. This is when concealed damage is discovered and documented.
After tear-off and documentation, the crew makes necessary repairs (replacing decking, installing flashing, adding ice and water shield), then installs new underlayment, shingles, and accessories. A typical single-layer residential roof takes 1-2 days to complete.
Regarding costs, most storm damage roof repairs are covered by homeowner's insurance minus your deductible. The deductible is your out-of-pocket responsibility and typically ranges from $500 to $2,500 depending on your policy. Some policies have separate wind/hail deductibles that may be calculated as a percentage of your coverage (commonly 1-2% of your dwelling coverage).
The total cost of a storm damage roof replacement varies significantly based on roof size, pitch, complexity, material choice, and regional labor rates. For a typical 25-square residential roof with architectural shingles, the total repair cost (including common supplement items) generally falls between $8,000 and $14,000 before overhead and profit.
The supplement portion of the cost, covering hidden damage discovered during tear-off, typically adds $800 to $2,500 to the initial estimate. This is additional insurance coverage, not an additional cost to you. A contractor who documents and submits supplements properly ensures the insurance company pays for the full scope of necessary repairs, which protects you from being asked to cover the difference out of pocket.
What Storm Damage Roof Repairs Typically Cost
How good contractors document damage for insurance (and how Supplement Snap helps)
The quality of damage documentation separates contractors who recover full insurance value from those who leave thousands of dollars on the table. For homeowners, this matters because thorough documentation means your insurance company pays for all necessary repairs. For contractors, this is the single biggest lever for revenue recovery on insurance jobs.
Good documentation during tear-off includes:
Wide-angle photos showing the damage in context (where on the roof it is located)
Close-up photos showing the damage in detail (the condition of the affected material)
A description of each finding: what was found, where, what condition it was in, and why it was concealed
Accurate measurements: square footage of damaged decking, linear footage of failed flashing, count of deteriorated pipe boots
Xactimate line codes mapped to each finding with correct quantities and current regional pricing
The challenge is that this documentation needs to happen on the roof, during active tear-off, with a crew that's focused on getting the job done. Most contractors lose critical documentation because the crew takes a few blurry photos on a personal phone, texts them to the office days later, and by the time someone writes up the supplement, the details are incomplete.
Supplement Snap solves this by putting the documentation tool directly in the crew's hands during tear-off. The crew member taps to capture a photo, selects the damage type (decking, flashing, pipe boot, ice and water shield), chooses the roof area, and records a quick voice note describing what they found. Voice notes work in any language, so Spanish-speaking crews describe findings naturally and the system auto-translates to English.
From that field data captured in real time, Supplement Snap generates the complete supplement package: AI-written professional narratives, Xactimate line items with correct codes and pricing, an exportable CSV, and a branded PDF report ready to email to the adjuster. The supplement gets submitted the same day the damage is found, while the evidence is fresh and the adjuster can verify it.
For homeowners, this means your contractor captures every legitimate finding and submits proper documentation so your insurance covers the full repair. For contractors, this means systematic supplement recovery on every insurance job, turning what used to be an afterthought into a reliable revenue stream.
For hail specifically, see our hail damage inspection guide.
References & Resources
Ready to streamline your supplement process?
Supplement Snap helps your crew capture hidden damage during tear-off and generate adjuster-ready reports in minutes.
Written by
Kelvin Spratt
Founder, Supplement Snap
Kelvin builds software for roofing contractors who are tired of leaving supplement money on the table. His background in software development and insurance restoration workflows drives everything Supplement Snap does.